DIY Dried Apple Slices

20171018_123802
Dried Apple Slices

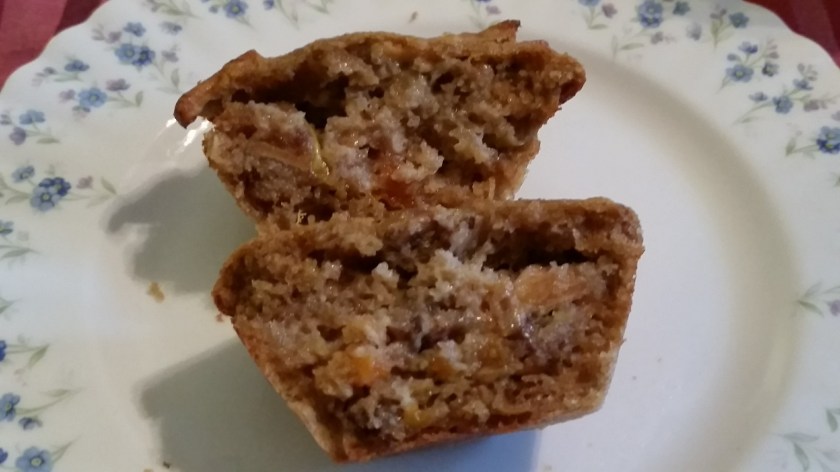
I was feeling like making a healthyish muffin recipe (Apple Apricot Muffins) which uses dried apples and apricots, but I didn’t have any dried apples on hand. But I do have plenty of fresh apples, and it turns out that drying them yourself couldn’t be easier. I have an old low quality food dehydrator that I’ve kind of given up on, so this was a test of the oven method, and it worked great. It also helps that we have a second oven in the drawer space underneath the regular oven, which comes in handy whenever I want to dry something for a long time on low heat.

There’s just a few key decisions to make. If you want to preserve the apple skin, which make the slices look prettier and increases their fiber content, then don’t peel them. Similarly, if you want the slices to have the pretty star shape in the center, don’t core them. But if you don’t like these chewy dried bits, go ahead and peel and core them. In that case, you’ll end up with more traditional looking apple rings.

20171017_175001
Apple slices soaking in lemon juice and water

Ingredients:

  • ~ 3 medium apples per baking sheet
  • 1/4 cup lemon juice
  • bowl of water
20171017_182203
Apple slices about to go in the oven

Steps:

  1. Setup a large bowl of cold water with lemon juice.
  2. Slice your apple in 1/8 inch slices, starting at one end.
  3. Soak the apples in the water for 20 – 30 mins. to minimize browning.
  4. Preheat the oven to 200 degrees.
  5. Spread a kitchen towel on your counter and place the apple slices on it. Pat them dry.
  6. Transfer the apple slices to your lined baking sheet(s).
  7. Bake the apple slices for about 3 hours, and flip the slices. Then bake for another hour or so. The exact time will vary based on your oven’s true temperature, the thickness of your apple slices, etc. I turned the oven off after about 4 hours, and let them sit in the oven for another 30 mins or so. At this point, mine were dry but soft in texture. If you want them to be crunchy, let them go another hour!


Apple Apricot Muffins

20171019_084314
Apple Apricot Muffins

This recipe is slightly adapted from the Cheese Board Collective Works cookbook (2003), and we’ve been enjoying it for over 10 years. It produces a mildly sweet pastry with a moist interior, and chewy chunks of dried apple and apricot. It also features oats, pecans, and wheat germ, and uses vegetable oil instead of butter, so I think of it as existing on the healthier side of the breakfast world. It’s a good Fall recipe and will leave you sated until lunch time.

You can prep all of the dry ingredients in advance, as I did, or you can even go as far as mixing the complete batter and storing it in the fridge until the morning. There’s a short resting period required for the oats and dried fruits to soak and expand, so don’t forget to figure this in to your prep time.

(Yield: about 15 muffins)

Ingredients:

  • 1 cup all purpose flour, plus 1/4 cup of whole wheat or spelt flour
  • 1 teaspoon baking soda
  • 1/2 teaspoon cinnamon
  • 1/2 teaspoon salt
  • 3/4 cup old-fashioned rolled oats
  • 1/4 cup white sugar
  • 1/2 cup packed brown sugar
  • 1/2 cup raw wheat germ
  • 1/2 cup chopped dried apples
  • 1/2 cup chopped dried apricots
  • 1/4 cup chopped pecans or walnuts
  • 2 eggs
  • 1 1/2 cups buttermilk
  • 1/3 cup vegetable oil
  • 1 teaspoon vanilla extract
20171019_080926
Muffin cups of batter

Steps:

  1. Combine all of the dry ingredients in a large mixing bowl. Stir in the dried fruits and nuts. (I use kitchen shears to cut the fruit into pieces, which seems to go faster and be less sticky than using a knife.)
  2. In a separate bowl, whisk together eggs, buttermilk, oil, and vanilla.
  3. Add wet ingredients to dry and stir gently until the majority of the flour is integrated.
  4. Let the batter rest for at least 15 minutes to allow ingredients to soak and expand fully. (At this point, you could refrigerate the batter until the morning.)
  5. Preheat the oven to 350 degrees, and grease or line your muffin pan.
  6. Fill muffin cups to the top and bake for about 28 minutes. The muffins will be a deep golden brown, firm, and springy. Let cool in the pan for 10 minutes.
20171019_082910
Apple apricot muffin with a little butter – yum!


Fruit leather

20170920_172817

Fruit leather is an easy way to use up leftover fruit and to preserve a sweet bit of summer! You can use almost any fruit, and it doesn’t require any special equipment. I like to make fruit leather in the summer when the berries are plentiful, and then stash it away for the winter, when we’re all missing those beautiful fresh local berries!

Ingredients:

  • 1 1/2 – 2 cups of pureed fruit(s), such as strawberries, blackberries, blueberries, raspberries, cherries, peaches, or pears
  • 1/4 cup sugar, agave, or honey
  • 1 to 2 teaspoons of lemon juice to preserve flavor and color

20170926_125822

Steps:

  1. Preheat oven to 175* (or the lowest temp you can set your oven to). Line a cookie sheet with parchment paper. (Wax paper would probably work too.)
  2. Puree the fruit and optionally strain the seeds out. Place pureed fruit in a small pot with sugar and lemon juice.
  3. Bring fruit to a boil over medium heat, then let it simmer for about 5 mins., and turn it off.
  4. Pour fruit onto parchment paper and use a rubber spatula to spread it evenly across the pan.
  5. Place pan in oven for at least 90 mins. It’s done when you can touch it and it doesn’t leave wet marks on your fingers. If your pan is small or you use an ample measure of fruit, it can take several hours to dry. Don’t worry; it will eventually dry out. And even if you accidentally let it go too long, it will still make a tasty fruit chip!
  6. Remove pan from oven and cool. When it’s cool, trim away excess paper. Then cut into squares or strips, leaving the paper backing in place to keep the fruit pieces from sticking to one another. Store in a ziplock bag in your pantry or cupboard.
20170928_103830
Raspberry fruit leather